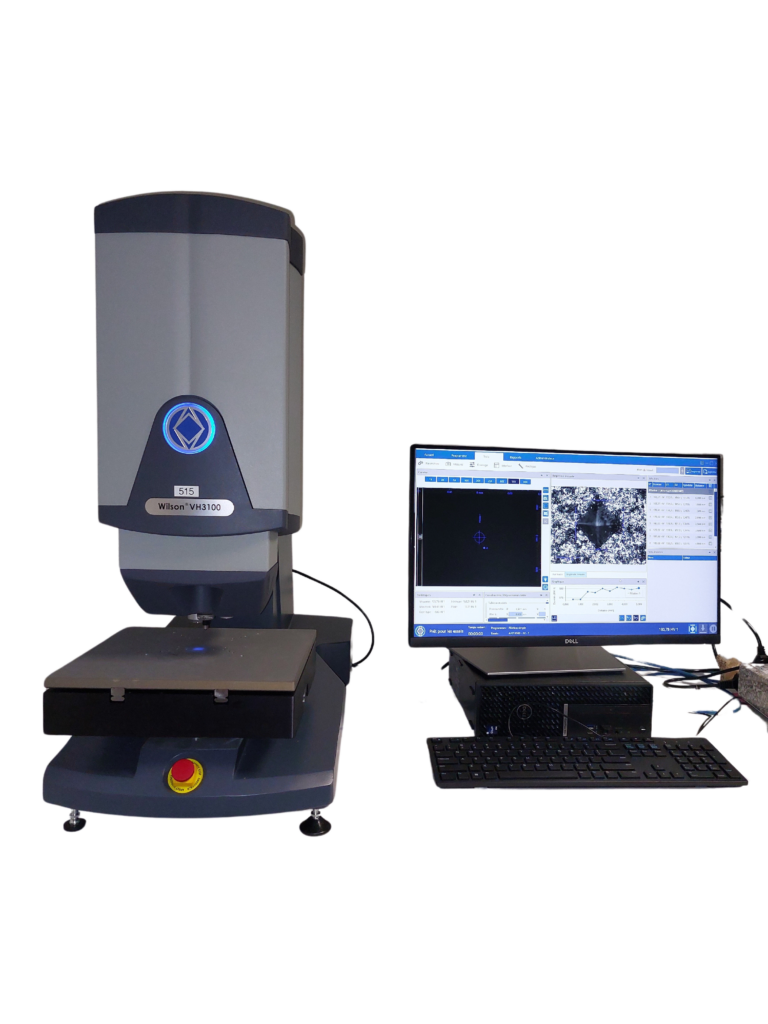
Vickers Hardness Testing (HV) in laboratory
You want to carry out a Vickers hardness (HV) test on your materials
Principles of Vickers hardness (HV) testing
Vickers hardness (HV) testing is also known as Vickers microhardnesstesting .
It is a method of measuring the hardness of a material by assessing its resistance to deformation. This laboratory test involves applying a controlled force using a diamond pyramid-shaped indenter to the surface of the material. The indentation left is then measured, and the hardness calculated on the basis of the load applied and the area of the indentation.

Why carry out a Vickers test?
Compliance
Ensuring that materials comply with technical specifications is a key issue in industries where safety and performance are paramount. Vickers hardness testing ensures that the materials used comply with ISO and ASTM standards, guaranteeing their suitability for specific applications.
Production optimisation
The microstructure of materials and quality are determining factors in the efficiency of industrial production. Vickers hardness testing can identify anomalies or heterogeneities in materials that could affect final product performance.
Quality control
Incorporating Vickers testing into quality controlprocesses enables companies to maintain high standards throughout production. These regular tests provide accurate data on the hardness and uniformity of materials. This not only enables deviations from specifications to be detected quickly, but also guarantees the conformity of finished products, thereby minimising non-conformities and problems with marketing.
Applications of hardness testing
Whether metals, ceramics or plastics, we have the skills and equipment to carry out Vickers hardness testing on a wide range of materials.
Metals analysis: Vickers hardness testing is essential for assessing the resistance of metals to wear and plastic deformation, ensuring their performance in critical applications.
Ceramics : These materials, although tough, are fragile. Vickers tests verify their resistance to micro-cracks and impacts, particularly in extreme environments.
Plastics analysis: Plastics must retain their properties under various stresses. The Vickers test assesses their hardness, ensuring mechanical stability for specific uses such as medical and packaging applications.
The FILAB laboratory supports manufacturers in Vickers hardness (HV) testing
Why choose FILAB for Vickers hardness measurement?
Through our three levels of services: analysis, expertise and R&D support, FILAB assists companies in all sectors with their laboratory Vickers hardness measurement needs.
FILAB provides its customers with the know-how and experience of its team, as well as a range of state-of-the-art analytical equipment.
Applicable standards for Vickers hardness?
To guarantee reliable and uniform results, several standards govern Vickers hardness testing.
ISO standards for metallic materials
ASTM standards for metals and ceramics
Hardness measurement in accordance with ISO standards 48-4 and 48-9
our other mechanical analysis services
Hardness measurement to ISO standards 48-4 and 48-9
FAQ
Vickers hardness is calculated by dividing the applied load by the surface area of the indentation. This area is determined from the average of the diagonals of the indentation left by the point.
Vickers hardness measurement is suitable for a wide variety of materials, including metals, ceramics, plastics and composites, thanks to its wide range of test forces.
The main difference lies in the indentor used: Vickers uses a diamond tip in the shape of a pyramid, while Brinell uses a steel or carbide ball. Vickers is also better suited to thin materials or surface layers, thanks to its smaller footprint.
Advantages include its versatility for different materials, its high accuracy, and its ability to test small areas, which is ideal for heterogeneous materials or small components.
The main advantage of this analysis method is that it provides accurate results over a wide range of hardnesses. It is particularly used for testing small parts or areas of fine microstructure.
This technique can be used to check that a material complies with technical specifications, to establish hardness filiations on a sample or to adjust the force of the impression applied.
As a manufacturer, to check Vickers hardness with a laboratory, here are the steps to follow:
- Select a specialist laboratory: Choose a laboratory with expertise in Vickers hardness testing, ideally accredited to ISO or ASTM standards.
- Define your requirements: Clearly communicate the type of material, the technical specifications and the reference standards (ISO or ASTM).
- Send the sample: Prepare and send a representative sample of your material to the laboratory.
- Analyse the results: Once the test has been carried out, the laboratory will provide you with a detailed report including the hardness values, the methods used and an interpretation of the results in relation to the standards. This will enable you to check the conformity and quality of your materials.


